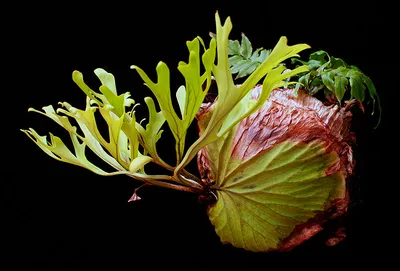
Mounting a Staghorn Fern is more than just a cultivation technique; it is an art form that replicates the plant’s natural epiphytic habitat. In the wild, these ferns cling to tree trunks in tropical rainforests, gathering nutrients from falling debris and moisture from the humid air. A properly mounted Platycerium can live for decades, growing into a spectacular living sculpture that becomes the centerpiece of any plant collection.
This guide covers everything from choosing the right mounting surface to securing heavy specimens, comparing binding materials, and recognizing when it is time to remount. Whether you are mounting your first P. bifurcatum pup or wrestling a 30-pound P. grande onto a new board, you will find the practical details you need here.
Choosing the Right Mounting Board
The mounting surface is the foundation of your display. It needs to resist rot (because it will be constantly damp), support increasing weight as the fern grows, and ideally provide a texture that roots can grip. For hanging advice and hardware specifics, see our hanging guide.
Mounting Board Comparison
| Material | Rot Resistance | Weight | Root Grip | Cost | Best For |
|---|---|---|---|---|---|
| Western red cedar | Excellent (natural oils) | Light | Good | $$ | All-around favorite; beginners |
| Cork bark slab | Excellent | Very light | Excellent | $$$ | Natural look; smaller ferns |
| Redwood | Excellent | Moderate | Good | $$$ | Long-term displays |
| Tropical hardwood (mango, teak) | Very good | Heavy | Fair | $$ | Outdoor tropical setups |
| Oak (untreated) | Moderate | Heavy | Good | $ | Budget option; short-term |
| Driftwood | Variable | Variable | Good | Free–$$ | Artistic displays |
| Tree fern slab | Excellent | Light | Excellent | $$$$ | Premium mounts; rare species |
Cedar: The All-Around Champion
Western red cedar is the most popular mounting board for good reason. Its natural oils (thujaplicins) resist rot and fungal growth without any chemical treatment. It is lightweight, easy to cut, and widely available at home improvement stores. A 1-inch thick cedar plank will last 5 to 10 years under constant moisture before needing replacement.
What to look for: Untreated, unfinished cedar boards. Avoid cedar that has been stained, sealed, or pressure-treated. Fence pickets are a cheap source, but confirm they have not been chemically treated.
Cork Bark: The Natural Choice
Cork bark slabs mimic the tree bark surface that staghorn ferns grow on in the wild. The rough, textured surface gives roots excellent grip, and cork is naturally resistant to rot and mold. It is also extremely lightweight, which matters when you are hanging a mount on drywall.
Drawbacks: Cork bark can be expensive, and thin pieces may crack or crumble under the weight of a large fern. For anything beyond a small P. bifurcatum, choose slabs at least 1.5 inches thick. Cork rounds (cross-sections) are sturdier than flat bark slabs.
Materials to Avoid
- Pressure-treated lumber: The chemical preservatives (copper, arsenic compounds) are toxic to plants and will leach into the moist moss.
- Pine and spruce: Rot quickly in damp conditions. A pine board will disintegrate within a year.
- Painted or sealed wood: Paint creates a barrier that prevents roots from gripping and traps moisture against the wood, accelerating decay.
- MDF, plywood, particle board: These contain glues that break down when wet and can release formaldehyde.
The Essential Toolkit
Before you begin, gather the following materials:
- Mounting Base: Untreated cedar, redwood, cork bark, or a sturdy hardwood plank.
- Medium: High-quality long-fiber sphagnum moss (see our substrate guide for alternatives).
- Binding Material: Fishing line (for an invisible look) or plastic-coated wire.
- Hardware: Stainless steel screws (if using the “screw and wire” method) and a hanging hook.
- Tools: Drill or screwdriver, scissors, a bucket for soaking moss, and optionally a staple gun.
Different Mounting Methods Compared
There is no single “correct” way to mount a staghorn fern. The best method depends on your species, available space, and aesthetic preference. Here is how the four main approaches compare.
Board Mounting
The classic approach. The fern is secured flat against a board that hangs on a wall.
Best for: Small to medium species like P. bifurcatum and its cultivars. Ideal for indoor display where wall space is available.
Pros: Clean visual presentation, easy to water (take down and soak), simple to inspect the root zone.
Cons: Limited root space constrains growth for large species. Heavy mature ferns can stress wall anchors.
Wire Basket Mounting
A hanging wire basket (like those used for orchids) is lined with sphagnum moss, the fern is placed inside, and additional moss is packed around the root ball. The basket hangs from a chain or hook.
Best for: Large species like P. grande and P. superbum that produce symmetrical rosettes. Also excellent for growing multiple pups together.
Pros: More root space, better moisture retention, weight distributed evenly through the chain, pups can emerge in all directions.
Cons: Harder to inspect the root zone, can drip when watered, takes up more space.
Kokedama (Moss Ball)
The root ball is wrapped in a sphere of sphagnum moss bound with string or fishing line, then hung from a single cord. A Japanese-inspired minimalist display technique.
Best for: Small ferns and young pups. Makes a striking display when grouped in clusters of three or five.
Pros: Beautiful, sculptural look. No board or basket needed. Easy to soak-water.
Cons: Dries out faster than other methods. The moss ball must be rebuilt every 1 to 2 years as the moss decomposes. Not practical for ferns over 3 to 4 pounds.
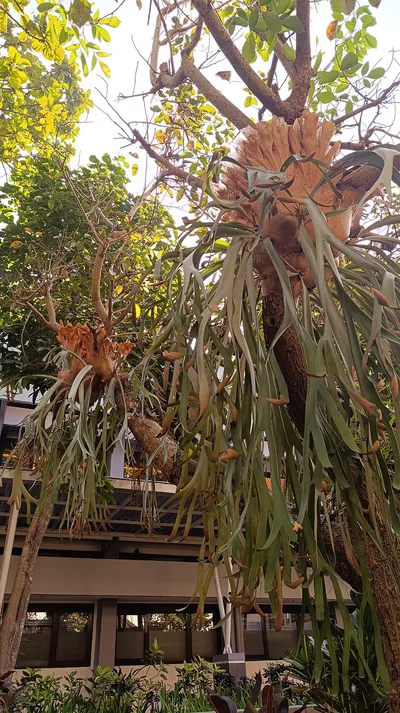
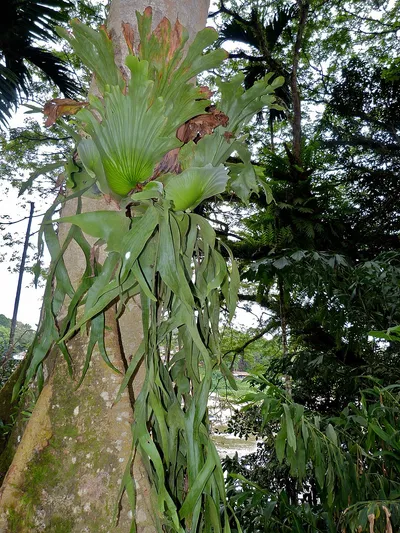
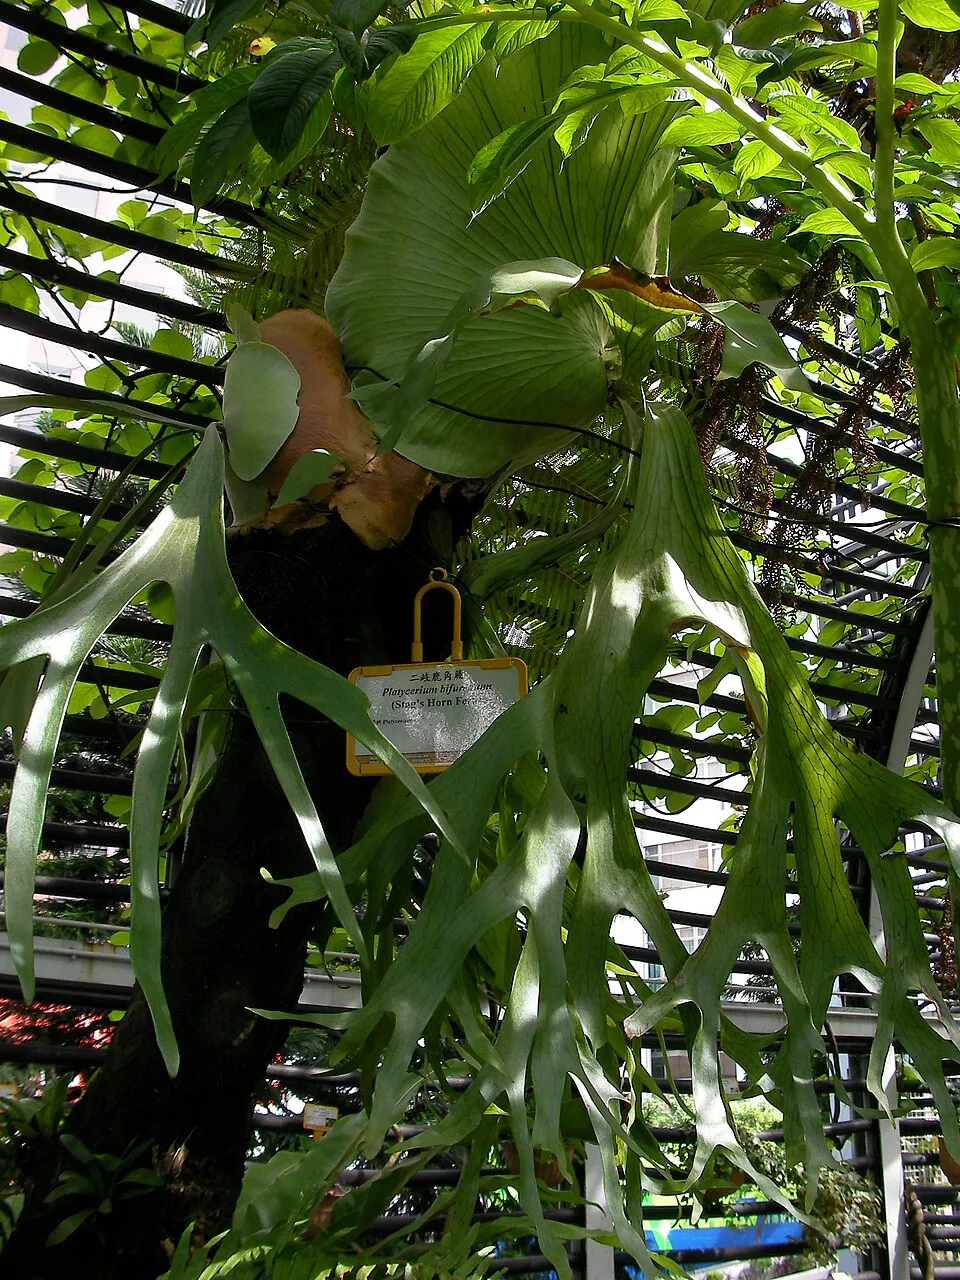
Tree Mounting (Outdoor)
In tropical and subtropical climates (USDA zones 9b to 11), staghorn ferns can be mounted directly onto living trees. This is the closest recreation of their natural habitat.
Best for: Outdoor growers in frost-free areas. Established P. bifurcatum colonies can grow to enormous size on mature trees.
Pros: Natural habitat replication, the fern can grow indefinitely without remounting, dramatic visual impact.
Cons: Only works in warm climates, harder to control watering and humidity, removal is difficult once the fern attaches firmly. For general care principles that apply to outdoor growing, see our care guide.
| Method | Best Species | Max Fern Size | Maintenance Level | Indoor/Outdoor |
|---|---|---|---|---|
| Board mount | P. bifurcatum, P. veitchii | Small–Medium | Low | Both |
| Wire basket | P. grande, P. superbum | Large–Very large | Medium | Both |
| Kokedama | Small pups, P. bifurcatum | Small only | High (dries fast) | Indoor |
| Tree mount | P. bifurcatum, P. hillii | Unlimited | Very low | Outdoor only |
Step-by-Step Board Mounting Tutorial
- Hydrate the Moss: Soak your sphagnum moss in a bucket of water for at least 30 minutes. Squeeze it out until it is damp but not dripping.
- Prepare the Base: If you’re using screws as anchor points, drive 4–6 screws into the board in a circle slightly larger than the fern’s root ball. Leave each screw head protruding about half an inch so you can loop binding material around them.
- The Moss Bed: Create a 1-inch thick circular bed of moss in the center of your board. This acts as the reservoir for the roots. For species that prefer less moisture, reduce the moss thickness to half an inch.
- Position the Fern: Place the fern on the moss. Crucial: Ensure the “growing point” (the center where new fronds emerge) is pointing upwards or slightly outwards, not buried in the moss.
- Add Shield Moss: Pack more damp moss around and over the root ball, covering it completely but leaving the shield fronds visible. Make sure there are no air pockets directly behind the root ball — roots need contact with moss to absorb water.
- Secure the Plant: Criss-cross your fishing line or wire over the moss and root ball, using the screws as anchors. Wrap it firmly enough that the plant doesn’t wobble, but not so tight that it cuts into the live tissue.
- The Finishing Touch: Trim away any stray moss and attach your hanging hardware to the top of the board. For detailed hanging instructions, see our guide to hanging staghorn ferns.
How to Mount on Cork Bark
Cork bark deserves its own section because the technique differs from board mounting. Cork’s irregular surface and porous texture create unique advantages and challenges.
Preparing the Cork
- Clean the bark: Brush off loose debris with a stiff brush. If the cork has been stored outdoors, soak it in water for an hour to hydrate it and flush out any insects.
- Check for stability: Cork bark slabs often have a natural curve. Choose a slab with a relatively flat center area for the moss bed. If the slab is too curved, the fern will sit at an awkward angle and the moss bed will slide.
- Drill anchor holes: Because you cannot drive screws into thin cork without cracking it, drill small holes (2 to 3 mm) through the bark where you want to run your binding material. Space them evenly in a circle around where the root ball will sit.
The Mounting Process
- Thread fishing line or thin wire through two opposing anchor holes and tie a loose loop on the front side.
- Build your moss bed directly on the cork surface. The porous texture holds moss well without any adhesive.
- Position the fern and pack additional moss around the root ball.
- Thread the binding material through each pair of anchor holes, pulling it snug over the moss and root ball in a crisscross pattern.
- Tie off securely on the back of the cork slab.
Tip: Attach a picture-hanging wire across the back of the cork before mounting the fern. Cork is too soft for most wall hooks, so distributing the hanging load across a wire prevents the hook from pulling through.
Mounting a Large or Heavy Staghorn Fern
Mounting a mature staghorn that weighs 15, 30, or even 50 pounds requires different strategies than mounting a small pup. Large specimens of P. grande and P. superbum can weigh well over 40 pounds when fully hydrated. If your large fern is struggling, consult our troubleshooting guide to rule out health issues before remounting.
Structural Considerations
- Use thicker boards. A 1.5- to 2-inch thick cedar plank or a solid hardwood slab is the minimum for heavy ferns. Thin boards will bow and eventually snap.
- Reinforce with a backing frame. For very heavy ferns, screw two horizontal battens across the back of the board. This distributes the load and provides extra material for wall-mounting hardware.
- Use heavy-duty wall anchors. Toggle bolts or lag screws into wall studs are essential. A 30-pound fern after soaking can exert 40+ pounds of pull on a wall anchor. Standard drywall anchors will fail.
- Consider a wire basket instead. For specimens over 20 pounds, a stainless steel wire basket hung from a ceiling hook or beam may be more practical than a wall-mounted board.
Technique Adjustments
- Work with a partner. One person holds the fern in position while the other wraps the binding material.
- Use wider binding material. Switch from fishing line to 2-inch cotton strips or nylon strapping. Thin line can cut into the moss and fail under heavy loads.
- Create a deeper moss bed. Large ferns need 2 to 3 inches of sphagnum moss behind them to hold adequate moisture for their larger root mass.
- Pre-wrap the root ball. Before placing the fern on the board, wrap the root ball in a “hammock” of fishing net or burlap. This contains the moss and root mass in one unit, making positioning much easier.
Best Binding Materials Compared
The binding material holds everything together until the fern’s shield fronds and roots naturally grip the mount. Choosing the right one affects aesthetics, longevity, and ease of use.
| Material | Visibility | Durability | Ease of Use | Biodegradable | Best For |
|---|---|---|---|---|---|
| Monofilament fishing line (20–30 lb test) | Nearly invisible | 2–5 years | Moderate (slippery) | No | Clean, polished display |
| Plastic-coated wire | Visible (green/brown) | 5+ years | Easy | No | Beginners; heavy ferns |
| Cotton string/strips | Visible (natural) | 3–6 months | Easy | Yes | Temporary; outdoor tree mounts |
| Nylon cable ties | Visible | 3+ years | Very easy | No | Quick mounts; wire baskets |
| Jute twine | Visible (natural) | 2–4 months | Easy | Yes | Kokedama; temporary holds |
| Copper wire (bare) | Visible (patina) | Indefinite | Moderate | No | Artistic displays (use with care) |
Fishing Line: The Invisible Option
Monofilament fishing line in the 20 to 30 pound test range is the most popular binding material because it practically disappears once the fern grows in. Use clear line for light-colored boards and green-tinted line for dark surfaces.
Technique tip: Fishing line is slippery. After wrapping it around the screw anchors, tie it off with a surgeon’s knot (an extra loop through the first half of a square knot) to prevent slipping.
Cotton String: The Biodegradable Option
Cotton string or strips of cotton fabric will decompose naturally within 3 to 6 months — roughly the time many staghorns need to grip on their own. This makes cotton an excellent choice if you want a “self-cleaning” binding that does not need to be cut away later.
Caution: If your fern has not attached firmly by the time the cotton decomposes, the fern will fall. Only use cotton for fast-growing species in warm, humid conditions where attachment is reliable.
Copper Wire: Use with Caution
Bare copper wire creates an attractive patina over time and lasts indefinitely. However, copper ions are antimicrobial and, in high concentrations, can damage plant tissue. If you use copper wire, wrap it over the moss rather than letting it contact the fronds or root ball directly. Plastic-coated copper wire eliminates this concern.
How Long Until the Fern Grips the Mount
One of the most common questions from new growers is when they can stop worrying about the binding material. The answer depends on species, growing conditions, and the texture of the mounting surface.
General Timeline
- 1 to 3 months: New shield fronds begin to emerge and flatten against the mounting surface. The fern starts to feel slightly more stable, but binding is still essential.
- 3 to 6 months: Shield fronds have grown over the edges of the moss bed and are pressing firmly against the board. Roots are actively growing into the moss and toward the board surface. You can test by gently wiggling the fern — it should resist movement.
- 6 to 12 months: The fern is firmly attached. Shield fronds have dried and hardened against the board, creating a biological “clamp.” You can carefully cut away any visible binding material at this point.
- 1 to 2 years: Roots have penetrated the wood or cork surface. The fern is essentially permanent. Only a chisel or saw will separate it from the mount.
Factors That Speed Up Attachment
- Warm temperatures (65 to 85 F): Growth is faster, shield fronds develop more quickly.
- High humidity (60%+ relative humidity): Roots grow faster in humid conditions. See our watering guide for humidity management techniques.
- Rough mounting surface: Cork bark and rough-sawn wood give roots more to grip than smooth, planed boards.
- Adequate light: Ferns in low light grow slowly and produce fewer shield fronds. Provide bright, indirect light for faster establishment.
- Species: P. bifurcatum is a fast grower that attaches quickly. P. grande and P. superbum are slower and may take a year or more.
Factors That Slow Attachment
- Cool temperatures (below 60 F): Growth nearly stops; shield fronds develop at a glacial pace.
- Low humidity (below 40%): Roots dry out before they can establish. Common problem with indoor growing in heated homes during winter.
- Smooth mounting surface: Sanded or planed wood gives roots nothing to grip. Rough up the surface with coarse sandpaper (60 grit) before mounting.
- Insufficient moss: If the moss bed is too thin, roots have nothing to grow through to reach the board.
Post-Mounting Care
A newly mounted fern is in a state of shock. Keep it in a high-humidity, medium-light area for the first two weeks. Avoid fertilizing until you see active new growth (either a new shield frond or fertile frond emerging). Once growth resumes, follow our complete care guide for ongoing maintenance.
The First Two Weeks
- Humidity: Mist the moss and fronds daily, or place the mount near a humidifier. The goal is to prevent the root zone from drying out completely while the fern recovers from transplant shock.
- Light: Bright, indirect light only. No direct sun — a stressed fern is vulnerable to sunburn.
- Watering: Check the moss daily by pressing a finger into it. If the top half-inch is dry, give the mount a thorough soak (submerge the moss in a basin of room-temperature water for 10 to 15 minutes, or run water slowly over the moss for several minutes). For detailed watering techniques, see our watering guide.
- No fertilizer: Wait at least 3 to 4 weeks after mounting before introducing any fertilizer. Freshly damaged roots are vulnerable to fertilizer burn.
Weeks 3 Through 8
- You should see the first signs of new growth: a pale green shield frond tip emerging from the growing point, or a new fertile “antler” frond unfurling.
- Gradually move the fern to its permanent location, increasing light exposure over a week rather than moving it all at once.
- Begin a regular watering schedule based on the weight test described in our watering guide.
[!IMPORTANT] Orientation Matters: Always observe the natural orientation of the shield fronds. The “top” of the plant is where the newest shield fronds overlap the older ones. Mounting it upside down can lead to water trapping and rhizome rot.
Common Mounting Mistakes and How to Avoid Them
Even experienced growers make these errors. Recognizing them early can save your fern.
Mistake 1: Burying the Growing Point
The growing point (the fuzzy nub at the center where new fronds emerge) must remain exposed to air. Packing moss directly over it creates a damp pocket that leads to crown rot — the number one killer of mounted staghorn ferns.
Fix: When packing moss, shape it into a ring around the root ball rather than a mound over the top. The growing point should sit slightly above or at the same level as the surrounding moss.
Mistake 2: Using Too Little Moss
A thin layer of moss dries out within hours, especially indoors. The roots never stay moist long enough to grow, and the fern slowly declines.
Fix: Build a moss bed at least 1 inch thick (2 to 3 inches for large ferns). It should feel like a plump cushion behind the fern, not a thin veil.
Mistake 3: Mounting on Treated or Sealed Wood
Pressure-treated lumber, painted surfaces, and polyurethane-sealed boards all either leach chemicals or prevent root attachment. The fern may survive short-term but will never thrive.
Fix: Use only untreated, unfinished cedar, redwood, cork bark, or hardwood. If in doubt, sand the surface back to bare wood.
Mistake 4: Wrapping Binding Too Tightly
Over-tightened fishing line or wire can cut into the shield fronds and growing tissue, creating wounds that invite fungal infection.
Fix: The binding should be snug enough that the fern does not wobble, but you should be able to slide a pencil under the line where it crosses over the fronds. If the fronds develop brown indentations under the lines, loosen them immediately.
Mistake 5: Ignoring the Fern’s Natural Orientation
Every staghorn fern has a “top” and “bottom” determined by how the shield fronds overlap. Mounting the fern upside down or sideways forces water to pool behind the shield fronds instead of draining away, which causes rot.
Fix: Before removing the fern from its pot or old mount, mark the top with a small piece of tape. When remounting, respect that orientation. The newest shield frond (lightest green, closest to the growing point) should be at the top.
Mistake 6: Choosing the Wrong Location After Mounting
A freshly mounted fern placed in direct afternoon sun will desiccate rapidly. The moss bed cannot hold enough water to compensate for the evaporative demand of full sun.
Fix: Start in bright, indirect light. Only move to higher light after the fern has established for 2 to 3 months. For lighting recommendations, see our lighting guide.
When to Remount: Signs the Mount Is Failing
A well-made mount does not last forever. Wood decays, moss decomposes, and ferns outgrow their space. Here are the signs that it is time to remount.
The Board Is Rotting
Even rot-resistant cedar eventually breaks down under constant moisture. Tap the board — if it sounds hollow or feels spongy, the wood is rotting internally and could fail without warning. Ferns mounted on oak or untreated hardwood may need remounting in as little as 2 to 3 years.
The Moss Has Decomposed
Sphagnum moss breaks down over 1 to 3 years, compacting into a dense, airless mat. If watering the fern no longer produces any drainage (the water just sits on top of the moss), the moss has likely decomposed into a spongy plug. This suffocates roots and creates conditions for rot.
The Fern Has Outgrown the Mount
When shield fronds extend well beyond the edges of the board, or the fern’s weight causes the board to tilt on the wall, it is time for a larger mount. A fern that has outgrown its mount is also a good candidate for propagation — you may be able to divide pups during remounting.
The Fern Is Pulling Away
If the fern rocks or wobbles when touched, the original binding has degraded and the roots have not fully gripped. This is common when cotton string was used in low-humidity conditions. Rebind with fresh fishing line or wire, packing fresh moss into any gaps.
Persistent Health Decline
If your fern shows chronic symptoms — yellowing fronds, root rot, failure to produce new growth — despite proper watering and light, the mount itself may be the problem. A decomposed moss bed or rotting board creates anaerobic conditions that no amount of care adjustment can fix.
How to Remount
- Soak the fern for 20 to 30 minutes to make roots pliable.
- Cut away all binding material with scissors or wire cutters.
- Gently pry the fern away from the old mount. If roots have deeply penetrated the wood, it is better to cut around them with a utility knife than to tear them. Damaged roots recover, but torn-off root tips take weeks to regrow.
- Remove old, decomposed moss from around the root ball. Tease it out with your fingers, but do not strip the roots bare — leave a thin layer of moss or root material to protect the fine root hairs.
- Inspect for pests and rot. This is the ideal time to check for scale insects, mealybugs, and root rot. Remove any black, mushy root tissue with a sterile blade.
- Mount onto a fresh board following the step-by-step process above with new sphagnum moss.
- Aftercare: Treat a remounted fern the same as a newly mounted one — high humidity, no fertilizer, and reduced light for two weeks.
Mounting Tips by Species
Different Platycerium species have different mounting preferences based on their growth habit, size, and root behavior.
- P. bifurcatum: The easiest species to mount. Tolerates a wide range of mounting surfaces and binds quickly. A cedar board is the standard choice. Produces pups freely, so plan for expansion or regular propagation.
- P. grande: Grows very large (up to 6 feet across). Best mounted in a wire basket or on an oversized board reinforced with a backing frame. Do not attempt a standard board mount for mature specimens.
- P. superbum: Similar in size to P. grande but does not produce pups — it is a solitary grower. Wire basket mounting is preferred. Needs exceptional drainage because the upright, nest-like shield fronds can trap water.
Final Thoughts
Mounting a staghorn fern rewards patience. The first few weeks are the most critical — maintain humidity, resist the urge to fertilize, and trust the process. Within a few months, your fern will begin to grip its mount and settle into vigorous growth. Within a year or two, you will have a living wall sculpture that will draw comments from every visitor.
For ongoing care after your fern is established, see our complete care guide, indoor care tips, and watering techniques.